When I was young, there was nothing quite like a Drakes's Ring Ding.
(Depending on where you live, you might know them as Hostess Ding Dongs, Hostess Big Wheels or even Hostess King Dons. The original, however, was the Ring Ding by Drake.) Whichever name you remember them by...you certainly remember them. That's why you are reading this.
I got to thinking about them recently. I'm not sure why...but they were just on my mind. First, I was thinking about Devil Dogs, but then the Ring Ding moved in and took over. (
This kind of thing happens to me quite more than you can imagine.)
The Ring Ding (
Ding Dong, King Don, Big Wheel) was a chocolaty, hockey puck-shaped, cake of goodness with a creamy white filling and wrapped in a thin sheet of foil. Ring Dings were good. I remember them being especially good refrigerated. In my family of four kids, we got them VERY infrequently and if we did, they did not last long. In the 70's, my mom went through a stage where she was reducing the amount of sugar in our diets, because sugar caused hyperactivity back then. Ring Dings were pure surge, and for that reason, off limits.
Well, I do know that you can still buy them...I don't, but you can. Most people (parents) like me don't like them now because of all the chemicals (
See here for actual list.)
I got this idea that I wanted to figure out how to make them. However, I wanted to make them from scratch, without all the junk they put in them. (The same thing happened to me with Twinkies a couple of months ago. One night, a group of friends somehow got to talking about the shelf life of a Twinkie ... and there it was. I had to figure out how to make them from scratch. That story is for another day.)
Ok, back to the Ring Dings. So, first, I did my research on them. Newman E. Drake, the founder of the Drake Bakeries created the delicious treat many, many years ago. On the Drake website, it said the Newman started his career in baking at age 28 by selling his pound cake by the slice in Brooklyn, back in 1888.
(More on his fascinating story here.) Somehow, in his success, he created the Ring Ding. God bless him. Drakes also created a number of other memorable products (i.e. Yodels, Devil Dogs & Yankee Doodles)
Next I researched how to replicate this masterpiece called the Ring Ding. The cake is essentially a devil's food cake with an outer coating is a chocolate and a creamy white filling. I knew that this would be kind of tricky though. For instance, there are many different kinds of white filling, and I wanted mine to be just like the actual filling. The chocolate coating was another mystery...ganache or chocolate paraffin. So I started online...
Most of the recipes out there are for Ring Ding Cake, which is a standard cake that tastes similar to the delicious treat. However, I wanted to figure out how to make the real thing....hockey puck and all. This was no easy endeavor...in research
AND execution.
I wanted something that tasted
and looked like what I remembered. My recipe below is a conglomeration of 3 different recipes that I found online:
smitten kitchen (cake and filling),
Illinois Times (chocolate ganache frosting),
thepioneerwoman.com (hockey puck instructions).
I decided to make Ring Dings on Halloween this year for a pre-trick or treat party we were going to in the afternoon. (I needed an excuse for making them because my sweet wife is smart enough to know that if we make them for no reason, we will just eat them all.)
I will warn you...this took most of a Sunday for me. It was messy, very challenging, but very interesting...and fun. And I learned a lot! So will you. There ARE some things I would still like to improve. For instance, the hockey puck size and shape was not what I wanted and the ganache was too thick. (If you have any suggestions, please post.) The flavor was, however, UNBELIEVABLE!
So lets get started.
Ring Dings- THE Recipe
Cake Ingredients
- 3 ounces fine-quality semisweet chocolate (I used Ghirardelli)
- 1 1/2 cups hot brewed coffee (I used Starbucks VIA Italian Roast [Extra Bold])
- 3 cups sugar
- 2 1/2 cups cake flour
- 1 1/2 cups unsweetened cocoa powder (I used Hershey)
- 2 teaspoons baking soda
- 3/4 teaspoon baking powder
- 1 1/4 teaspoons salt
- 3 large eggs
- 3/4 cup vegetable oil
- 1 1/2 cups well-shaken buttermilk
- 3/4 teaspoon vanilla
Start by preheating the oven to 385° F. (I tried other temps, but this worked best. In fact, I checked my internal oven with a laser/infrared thermometer and my oven was spot on.)
*Grease AND flour muffin pans 12 per baking batch. (Ok, I learned a lot about this today and will share my findings later.)
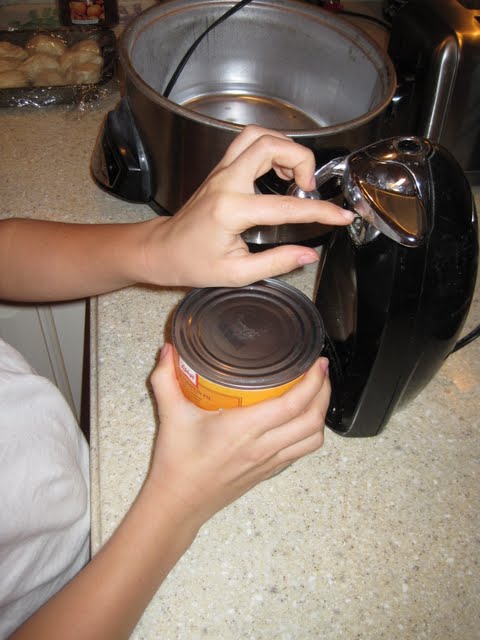
Boil 1 1/2 cups water and stir in instant coffee. I took a measuring cup with 1 1/2 cups of water and microwaved it until visibly boiling. Then I added instant coffee.
Mix chocolate into hot coffee, and stir until dissolved and a smooth liquidy form. (My chocolate came in a "chip" form. If yours is block, you will need to chop it into very small pieces first.)
Into a large bowl sift together sugar, flour, cocoa powder, baking soda, baking powder, and salt. (I put this in my Kitchen Aid mixer and put the whisking attachment on low while I added each ingredient.)
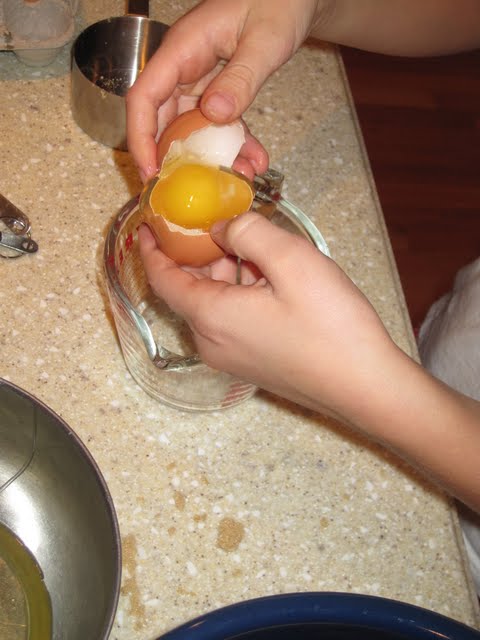
"In another large bowl with an electric mixer beat eggs until thickened slightly and lemon colored (about 3 minutes with a standing mixer or 5 minutes with a hand-held mixer)." (I used a handheld for at least 5 minutes and it never got lemony colored.)
 |
| Is this considered lemony? |
Slowly add oil, buttermilk, vanilla, and melted chocolate/coffee mixture to eggs, beating until combined well.
Add this to the sugar mixture and beat on medium speed until just combined well. (Now, this part was on the verge of disaster. My Kitchen Aid mixer is large (6 qt), but not large enough for this task. When I turned it on low, it would reach high tide and drip down the sides immediately. So, I ended up lowering the bowl until the mixture was partially blended, then I was able to raise the bowl for the final mixing.)
 |
| Most cooking shows do not show you this part... |
Add 1/3 cup of mix to Texas muffin pan size.
 |
| Notice, that this is not floured. See disclaimer. |
 |
| "He's bound to spill something." |
Bake for exactly 11 minutes until toothpick in center comes out clean. (I have a Raytek digital infrared thermometer and my oven is exactly on...so check your temp and adjust if necessary.)
Let them rest for 2 minutes before removing from tins. (
As you will see from my photos, they were NOT coming out of the tins easily. So this is where I learned about greasing and flouring.)
 |
| When it says, "non-stick", what does that actually mean? |
 |
| I have a lot to learn. |
*Greasing and Flouring- (Update: Spray Pam Happy Banking. Worked like a charm)
I had virtually no success with just greasing. I have non-stick pans, but honestly I do not know what I am doing, so I researched this and this is what I learned...and it definitely helped, but the Ring Dings
never just fell out of the pan. I compared Crisco and original Pam for this, and the Pam worked a bit better. Spray each muffin slot with a quick blast, being sure that the whole muffin slot is coated. Then, take a pinch (probably 1/2 tsp of flour) and drop in every muffin slot. Then turn and tap the tin until all the muffin slots are lightly and evenly coated with flour. Then, turn the muffin tin upside down and tap out any remaining flour. Even so, I still had to coax the muffins out with a spoon, but they did not tear anymore.
 |
| Sprayed, dusted, and dumped. |
Marshmallow, or Seven Minute Frosting (
Why did I never know about this before?)
- 2 large egg whites
- 1/2 cup sugar
- 1/4 cup light corn syrup
- 2 tablespoons water
- 1 1/2 teaspoons pure vanilla extract
Combine frosting ingredients with a pinch of salt in a metal bowl.
Set over a saucepan of simmering water and beat with a handheld electric mixer at high speed until frosting is thick and fluffy, 6 to 7 minutes. (
Ahh, the name "Seven Minute Frosting" I can be slow to catch on.)
 |
| Several minutes later...nice frothy texture. |
Remove bowl from heat and continue to beat until slightly cooled.
(Use frosting the day it is made.)
 |
| This is beautiful...and delicious. |
Next, you will fill each Ring Ding cake with the filling. Start by scooping out the icing into a large (1 Gallon) ziplock bag.
 |
| This is messy...no matter what. |
For me, this was a temporary tank to fill the small metal injector. I cut about a 1" corner off and would use this to refill the injector. Still messy, but way better than trying to scoop it. I think that I need a more professional pastry or piping bag. For now, this is what I got...
 |
| See...that's not so bad. |
There are two ways to accomplish this next part. You can either poke a hole (with a chopstick) and dig out room for the filling, OR you can do what I did and that is just stick the tip of the injector into the cake and fill. As you inject, you will feel the Ring Ding growing and you do not want to overfill, or break through the other side. Any mistakes can be eaten before anyone else notices. As I fill, I slowly pull the injector out, to make room for the filling. As a result. it will ooze out on one side. That is perfectly fine.
(Update: I cut a slice down the side, like a pocket, being careful not to cut all the way through. Then I opened it up and spooned a heap inside. this appears to be an easier option.)
Place on a baking sheet covered in parchment paper, as there still a little "stick" to them.
Ganache Frosting Recipe
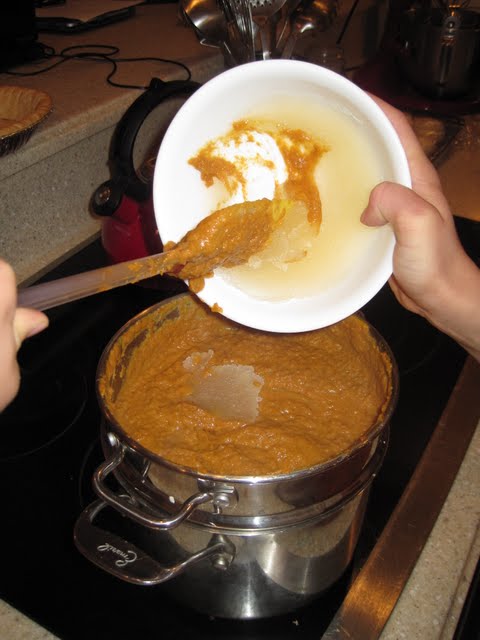
Prepare the ganache by heating the cream in a heavy pan to just below a simmer, stirring constantly to help prevent sticking.
Remove pan from the heat and add the chocolate.
Turn heat to low and return pan to stove, whisking the mixture until smooth.
Keep over lowest heat possible while you coat the cakes. Use spoon to pour over cakes. (There is probably a better way to do this, like to dip each on in the ganache. Mine was a bit too thick to do this though.)
When finished, place entire tray in fridge to set chocolate.
Then stand aside! If you are between anybody and your Ring Dings, you will be run over.
As I said, I took these to a Halloween party and everyone raved about how authentic they tasted. So I still want to master the hockey puck and I could definitely get some help on the ganache coating. For now, the flavor still rings in my brain, and I care about nothing. Thank you, Newman Drake. You are an inspiration.